DIY Lipstick: How to Make Your Own Lipstick at Home
Sample meta description.
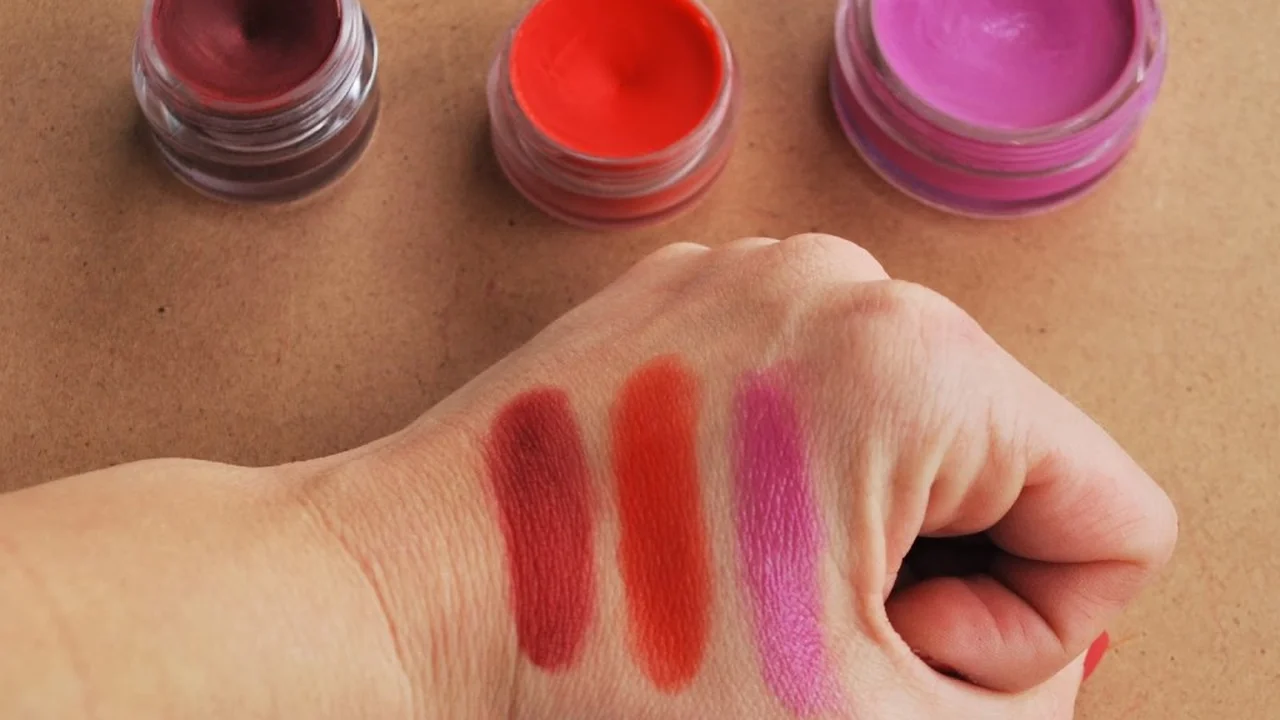
DIY Lipstick The Ultimate Guide to Homemade Lip Color
Ever dreamed of creating your own signature lipstick shade? Forget mass-produced colors that just don't quite hit the mark. With a little bit of know-how, you can whip up custom lipsticks right in your kitchen. This guide will walk you through everything you need to know, from basic recipes to advanced techniques, ensuring you get the perfect pout every time.
Why Make Your Own Lipstick The Benefits of DIY Lip Color
So, why bother with DIY lipstick? Well, for starters, you have complete control over the ingredients. No more worrying about hidden chemicals or allergens. You can use all-natural, organic components, creating a lipstick that's not only beautiful but also good for your lips. Plus, it's a fantastic way to express your creativity and experiment with unique colors you won't find anywhere else. Think that perfect nude? Or maybe a shade of red that just pops on your skin tone? You can make it all! And let’s be honest, bragging rights are a pretty good perk too. Imagine telling your friends, “Oh, this? I made it myself.”
Essential Ingredients for DIY Lipstick A Comprehensive List
Before you start mixing and melting, you'll need to gather your supplies. Here's a rundown of the essential ingredients:
- Base Oils: These provide moisture and a smooth texture. Consider options like shea butter, coconut oil, almond oil, and jojoba oil. Each offers slightly different properties; shea butter is incredibly moisturizing, while coconut oil provides a nice sheen.
- Waxes: Wax gives your lipstick structure and helps it hold its shape. Beeswax is a popular choice, but you can also use candelilla wax or carnauba wax for vegan options. Experiment to see which wax gives you the texture you desire.
- Colorants: This is where the fun begins! You can use micas, iron oxides, and ultramarines to create a wide range of colors. Food-grade pigments are also an option, especially if you're concerned about safety. Just be sure to research the safety and suitability of any pigment before using it on your lips.
- Essential Oils (Optional): Add a few drops of your favorite essential oil for a pleasant scent and potential added benefits. Peppermint oil can give your lips a slight plumping effect, while lavender oil can be calming.
- Vitamin E Oil (Optional): A natural antioxidant that helps to extend the shelf life of your lipstick and provides extra moisture.
Basic DIY Lipstick Recipe A Step-by-Step Guide
Ready to get started? Here's a simple recipe to get you going:
Ingredients:
- 1 tablespoon base oil (e.g., shea butter, coconut oil)
- 1 tablespoon beeswax
- 1/2 teaspoon colorant (mica, iron oxide)
- A few drops of essential oil (optional)
Instructions:
- Melt the Ingredients: Combine the base oil and beeswax in a double boiler or a heat-safe bowl set over a pot of simmering water. Heat until completely melted and smooth.
- Add Color: Remove from heat and stir in your chosen colorant. Start with a small amount and gradually add more until you achieve your desired shade. Remember, a little goes a long way!
- Add Essential Oil (Optional): If using, add a few drops of essential oil and stir well.
- Pour into Containers: Carefully pour the mixture into lipstick tubes, small jars, or even empty lip balm containers.
- Let it Set: Allow the lipstick to cool and harden completely, which usually takes a few hours.
Advanced Techniques for DIY Lipstick Customizing Your Creation
Once you've mastered the basic recipe, you can start experimenting with more advanced techniques:
- Layering Colors: Create multi-dimensional shades by layering different colorants.
- Adding Shimmer: Incorporate a touch of glitter or a pearlescent mica for a shimmery finish.
- Creating Matte Lipsticks: Use a higher ratio of wax to oil for a matte texture. You can also add a small amount of arrowroot powder to absorb excess oil.
- Making Long-Lasting Lipsticks: Add a small amount of silica microspheres to help the lipstick adhere to your lips for longer.
Troubleshooting Common DIY Lipstick Problems And Solutions
Sometimes, things don't go as planned. Here are some common problems and how to fix them:
- Lipstick is too soft: Add more wax to the mixture.
- Lipstick is too hard: Add more oil to the mixture.
- Color is not intense enough: Add more colorant.
- Lipstick is grainy: Make sure the beeswax is completely melted and smooth. You may also need to use a finer-grade mica.
DIY Lipstick Safety Precautions Ensuring a Safe and Healthy Product
Safety should always be your top priority when making DIY cosmetics. Here are some important precautions to keep in mind:
- Use Food-Grade or Cosmetic-Grade Ingredients: Never use ingredients that are not specifically intended for cosmetic use.
- Sanitize Your Equipment: Thoroughly clean and sanitize all of your equipment before and after use.
- Test on a Small Area: Before applying the lipstick to your entire lips, test it on a small area of skin to check for any allergic reactions.
- Store Properly: Store your homemade lipstick in a cool, dry place away from direct sunlight.
- Be Aware of Shelf Life: Homemade lipstick typically has a shorter shelf life than commercially produced lipstick. Discard it if it starts to smell or look strange.
Recommended Products for DIY Lipstick A Curated Selection
Okay, so you're ready to buy some ingredients. Here are a few recommendations, with price ranges and use cases:
- Shea Butter: Unrefined shea butter is fantastic for adding moisture. Look for brands like Better Shea Butter (around $15 for 1 lb). It's great for everyday wear and especially helpful in dry climates.
- Beeswax Pellets: Easy to measure and melt. A good option is White Beeswax Pellets from Amazon (around $10 for 1 lb). Use this as your base for most lipsticks, providing a firm but comfortable texture.
- Mica Powders: Eye shadow palettes often have a wide range of colours that are cosmetic grade. Using a small amount of these as your colorant is a cost effective method.
- Jojoba Oil: Adds a silky feel. Try Desert Essence Jojoba Oil (around $12 for 4 oz). Perfect for lipsticks intended for special occasions, providing a luxurious feel.
- Coconut Oil: Adds a subtle shine. Viva Naturals Organic Coconut Oil (around $10 for 16 oz). It is great for summer lipsticks, giving a glossy appearance.
Comparing DIY Lipstick with Store-Bought Options A Cost-Benefit Analysis
Let's break down the pros and cons of DIY versus store-bought:
DIY Lipstick:
- Pros: Customization, natural ingredients, cost-effective in the long run (especially if you make a lot), satisfying creative outlet.
- Cons: Requires initial investment in ingredients, takes time and effort, can be challenging to achieve professional-level results.
Store-Bought Lipstick:
- Pros: Convenient, wide variety of colors and finishes, generally consistent quality, readily available.
- Cons: Can contain questionable ingredients, limited customization, often more expensive per application.
Ultimately, the best choice depends on your individual needs and preferences. If you value customization, natural ingredients, and a creative outlet, DIY lipstick is a great option. If you prioritize convenience and variety, store-bought lipstick might be a better fit.
Different Lipstick Finishes and Textures Achieving Your Desired Look
Let's talk about finishes! You're not just limited to "lipstick." You can create a whole range of looks:
- Creamy: Achieve this by using a higher oil content and a soft wax like shea butter.
- Matte: More wax, less oil, and consider adding arrowroot powder.
- Glossy: Add a touch of castor oil or a clear lip gloss base to your mixture.
- Shimmery: Incorporate a pearlescent mica or cosmetic-grade glitter.
Using DIY Lipstick in Different Scenarios From Everyday Wear to Special Occasions
Think about where you'll be wearing your lipstick. A subtle nude for the office? A bold red for a night out? A shimmery gloss for a summer party? Adjust your ingredients and colors accordingly. For example:
- Everyday Wear: Opt for a creamy, moisturizing formula with a neutral color.
- Special Occasions: Go for a bold color with a long-lasting formula.
- Summer: Choose a glossy formula with a bright, summery color.
- Winter: Use a moisturizing formula with a deep, rich color.
DIY Lipstick Recipes for Specific Skin Tones Finding Your Perfect Match
Consider your skin tone when choosing colors. Here are some general guidelines:
- Fair Skin: Light pinks, peaches, and nudes.
- Medium Skin: Roses, berries, and corals.
- Olive Skin: Oranges, reds, and browns.
- Dark Skin: Deep reds, purples, and browns.
But don't be afraid to experiment! These are just starting points. The best way to find your perfect match is to try different colors and see what you like.
DIY Lipstick Storage and Shelf Life Maximizing Longevity
Proper storage is key to extending the shelf life of your homemade lipstick:
- Store in a Cool, Dry Place: Avoid direct sunlight and heat.
- Use Airtight Containers: Lipstick tubes or small jars with tight-fitting lids are ideal.
- Label Your Lipsticks: Include the date you made them.
Homemade lipstick typically lasts for 6-12 months, depending on the ingredients you use. If it starts to smell or look strange, it's time to toss it.
DIY Lipstick Gifting Ideas Sharing Your Creations with Others
Homemade lipstick makes a thoughtful and unique gift! Consider these ideas:
- Create a custom shade for a friend.
- Package your lipsticks in cute gift boxes.
- Include a handwritten note with instructions on how to use and store the lipstick.
- Make a whole set of lip products, like lip balm, lip scrub, and lipstick.
DIY Lipstick Party Hosting a Fun and Creative Event
Gather your friends for a DIY lipstick party! Here's how to make it a success:
- Provide all the necessary ingredients and equipment.
- Offer a variety of colors and finishes.
- Play some music and serve some snacks and drinks.
- Let everyone create their own custom lipsticks to take home.
The Future of DIY Lipstick Trends and Innovations
The DIY beauty movement is only growing stronger. Expect to see more innovative ingredients, techniques, and tools emerge in the coming years. From sustainable packaging to personalized color matching, the possibilities are endless. So, keep experimenting, keep learning, and keep creating!
:max_bytes(150000):strip_icc()/277019-baked-pork-chops-with-cream-of-mushroom-soup-DDMFS-beauty-4x3-BG-7505-5762b731cf30447d9cbbbbbf387beafa.jpg)


