How to Fix Lipstick Mistakes: Quick and Easy Solutions
Sample meta description.
Common Lipstick Application Problems and Quick Fixes
Okay, let's be real. We've all been there. You're rushing out the door, swiping on your favorite lipstick, and BAM! Disaster strikes. Maybe it's smeared outside your lip line, maybe it's clinging to dry patches, or maybe you just chose the wrong shade altogether. Don't panic! Lipstick mistakes are totally fixable, and I'm here to give you the quick and easy solutions you need. We’re going to dive into the most common lipstick woes and how to tackle them head-on. Think of this as your lipstick SOS guide!
The Dreaded Feathering
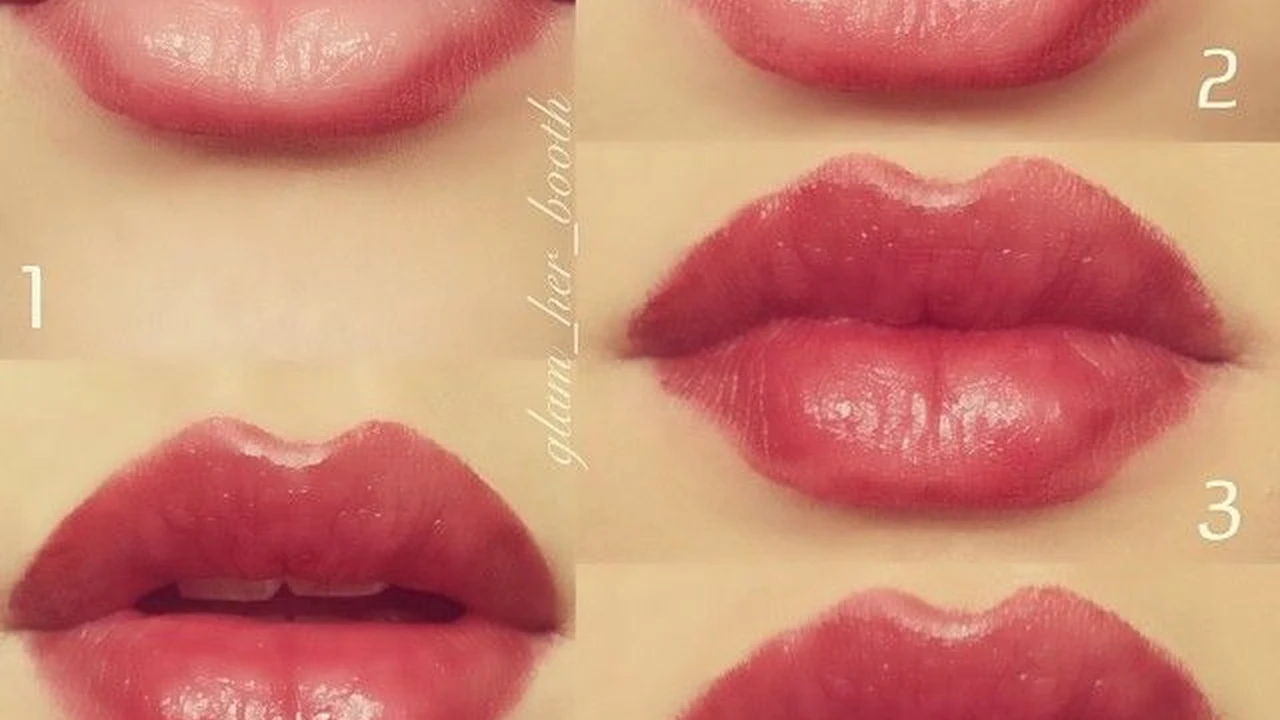
Feathering, those annoying little lines that bleed around your lips, is a common culprit. It happens when lipstick seeps into fine lines around your mouth. The fix? First, exfoliate your lips! A gentle lip scrub or even a soft toothbrush can work wonders. This removes dead skin cells that can contribute to feathering. Then, the real secret weapon: lip liner! Choose a lip liner that matches your lipstick shade or is slightly darker. Line your lips carefully, focusing on the outer edges. This creates a barrier to prevent the lipstick from bleeding. You can even fill in your entire lip with the liner for extra staying power. Another tip: blot your lipstick after applying the first coat. This helps remove excess product that's more likely to feather.
Uneven Lipstick Application and Patchiness
Uneven application is a real pain. It can be caused by dry lips, applying too much product, or using a lipstick that's not very pigmented. To avoid this, always start with hydrated lips. Use a lip balm regularly, especially before applying lipstick. If your lips are already dry, apply a thick layer of balm and let it sit for a few minutes before blotting off the excess. When applying lipstick, start in the center of your lips and work your way outwards. Use a lip brush for more precise application. If you're using a bullet lipstick, apply light pressure and build up the color gradually. Avoid applying too much product at once, as this can lead to clumping and unevenness. For patchy formulas, consider using a lip primer. It creates a smooth base for your lipstick to adhere to. If you're still struggling with patchiness, try dabbing the lipstick onto your lips with your finger instead of swiping. This can help distribute the color more evenly.
Lipstick on Your Teeth: The Ultimate Embarrassment
Oh, the horror! Lipstick on your teeth is a universally dreaded makeup mishap. Luckily, there's a simple trick to prevent it: the finger trick. After applying your lipstick, make an "O" shape with your mouth and place a clean finger inside. Gently pull it out. Any excess lipstick that would have ended up on your teeth will now be on your finger. You can also use a tissue to blot the inside of your lips. Another helpful tip: avoid applying lipstick too close to the inner rim of your lips. This is where it's most likely to transfer to your teeth.
Smudged Lipstick Around the Lip Line
Smudging happens! It’s often caused by accidentally rubbing your lips or eating and drinking. The solution is simple: concealer. Keep a small concealer brush and your favorite concealer handy. Dip the brush into the concealer and carefully clean up any smudges around your lip line. Blend the concealer outwards for a seamless finish. You can also use a cotton swab dipped in makeup remover to clean up smudges. Be gentle and avoid rubbing too hard, as this can irritate your skin. Setting your lipstick with a translucent powder can also help prevent smudging. Apply a light dusting of powder around your lip line with a small brush.
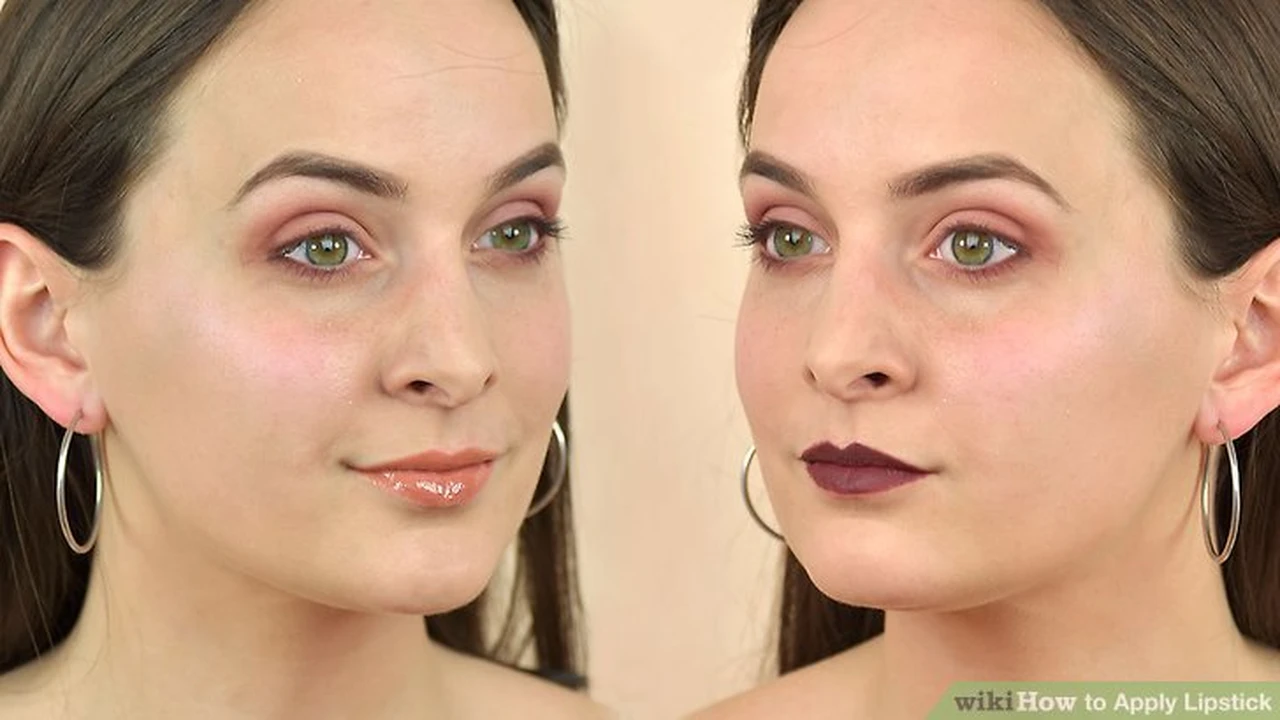
Choosing the Wrong Lipstick Shade and Color Correction Techniques
We’ve all been there – that lipstick looked amazing on someone else, but on you? Not so much. The wrong shade can wash you out, make your teeth look yellow, or simply clash with your complexion. The key is understanding your undertones. Are you warm (golden, peachy), cool (pink, blue), or neutral? Warm undertones look great in warm-toned lipsticks like corals, oranges, and warm reds. Cool undertones shine in cool-toned lipsticks like pinks, berries, and blue-based reds. Neutral undertones can pull off a wider range of shades. If you've chosen a shade that's too light, try layering it over a darker lip liner. If it's too dark, try blotting it down with a tissue or applying a lighter gloss on top. You can also use a lip brush to blend the edges of the lipstick, creating a softer, more diffused look. If the shade completely clashes, don't be afraid to wipe it off and start over! Better to spend a few extra minutes finding the right shade than to wear something that makes you feel uncomfortable.
Product Recommendations for Flawless Lipstick Application and Lasting Color
Okay, now that we've covered the fixes, let's talk about preventing mistakes in the first place. Having the right products in your arsenal can make all the difference. Here are a few of my favorites, with details on their uses, comparisons, and approximate prices:
Lip Liners: Defining and Preventing Feathering
Lip liner is a MUST-HAVE for preventing feathering and creating a defined lip shape. Here are a few options:
* **Charlotte Tilbury Lip Cheat Lip Liner (Pillow Talk):** This is a cult-favorite for a reason. The Pillow Talk shade is a universally flattering nude-pink that works with almost any lipstick. It's creamy, long-lasting, and waterproof. It's perfect for defining your lips and preventing feathering. *Price: $25* * **MAKE UP FOR EVER Artist Color Pencil:** These pencils come in a huge range of shades, so you can find the perfect match for any lipstick. They're highly pigmented and long-wearing. They can be used to line the lips, fill them in completely, or even as an eyeshadow base. *Price: $20* * **NYX Professional Makeup Slim Lip Pencil:** This is a fantastic budget-friendly option. It comes in a wide range of shades and is surprisingly long-lasting for the price. It's perfect for everyday use. *Price: $5***Comparison:** The Charlotte Tilbury liner is the most luxurious and has the best color selection, but it's also the most expensive. The MAKE UP FOR EVER pencils offer a great balance of quality and price. The NYX pencils are the most affordable, but they may not be as long-lasting or pigmented as the other options.
**Usage Scenario:** Before applying lipstick, carefully line your lips with your chosen lip liner. Start at the center of your cupid's bow and work your way outwards. You can also fill in your entire lip with the liner for extra staying power.
Lip Primers: Creating a Smooth Canvas and Extending Wear
Lip primers create a smooth base for your lipstick to adhere to, preventing patchiness and extending wear.
* **MAC Prep + Prime Lip:** This is a classic lip primer that smooths the lips, fills in fine lines, and prevents lipstick from feathering. It's lightweight and comfortable to wear. *Price: $20* * **Urban Decay Ultimate Ozone Multipurpose Primer Pencil:** This primer can be used on the lips, eyes, and face. It's clear, so it works with any lipstick shade. It helps to fill in fine lines and create a smooth base. *Price: $22* * **e.l.f. Cosmetics Lip Primer & Plumper:** This is a budget-friendly option that primes and plumps the lips. It contains ingredients that help to hydrate and smooth the lips. *Price: $4***Comparison:** The MAC primer is a classic and reliable option. The Urban Decay primer is versatile and can be used on other areas of the face. The e.l.f. primer is the most affordable, but it may not be as effective as the other options.
**Usage Scenario:** Apply a thin layer of lip primer to your lips before applying lipstick. Allow it to dry for a few seconds before applying your lipstick.
Lipstick Removers: Gentle and Effective Cleanup
Having a good lipstick remover on hand is essential for cleaning up mistakes and removing stubborn lipstick at the end of the day.
* **Kiehl's Lip Balm #1:** Yes, a lip balm can be a great gentle makeup remover! Apply a generous amount to your lips and let it sit for a minute or two. Then, gently wipe away the lipstick with a tissue or cotton pad. This is especially good for sensitive skin. *Price: $10* * **Bioderma Sensibio H2O Micellar Water:** This micellar water is a cult-favorite for removing all types of makeup, including lipstick. It's gentle, effective, and doesn't require rinsing. *Price: $15* * **Neutrogena Makeup Remover Cleansing Towelettes:** These towelettes are convenient for on-the-go makeup removal. They're pre-moistened and effectively remove lipstick and other makeup. *Price: $7***Comparison:** Kiehl's Lip Balm is the gentlest option and great for removing light lipstick. Bioderma Micellar Water is effective for removing all types of makeup. Neutrogena towelettes are convenient for on-the-go use.
**Usage Scenario:** Apply your chosen lipstick remover to a cotton pad and gently wipe away the lipstick. Avoid rubbing too hard, as this can irritate your skin.
Lip Brushes: Precision Application and Blending
A lip brush allows for precise application and blending, especially with tricky lipstick formulas.
* **Real Techniques Lip Brush:** This brush has a firm, tapered tip that allows for precise application. It's also affordable and easy to find. *Price: $6* * **MAC 316 Lip Brush:** This is a high-quality lip brush with a stiff, flat brush head. It's perfect for applying lipstick with precision and creating a defined lip line. *Price: $27* * **Sephora Collection PRO Lip Brush #81:** This brush has a soft, tapered brush head that's perfect for blending lipstick and creating a diffused look. *Price: $18***Comparison:** The Real Techniques brush is the most affordable and a good all-around option. The MAC brush is the most precise and best for creating a defined lip line. The Sephora Collection brush is best for blending and creating a diffused look.
**Usage Scenario:** Dip the lip brush into your lipstick and apply it to your lips, starting at the center and working your way outwards. Use the brush to create a defined lip line and blend the lipstick for a seamless finish.
Specific Lipstick Application Scenarios and Solutions
Let's break down some specific situations and the best ways to handle them.
The "First Date" Lip: Long-Lasting and Transfer-Proof
You want a lipstick that looks great, lasts through dinner and drinks, and doesn't end up all over your date's face. Opt for a long-lasting liquid lipstick with a matte finish. These formulas are typically transfer-proof and can last for hours. Brands like Maybelline SuperStay Matte Ink or Fenty Beauty Stunna Lip Paint are great choices. Apply a thin layer and let it dry completely before eating or drinking. Avoid oily foods, as they can break down the lipstick. If you're worried about dryness, apply a hydrating lip balm underneath the lipstick, but blot it off well before applying the liquid lipstick.
The "Office Appropriate" Lip: Subtle and Polished
Keep it professional with a neutral or nude lipstick shade. Creamy or satin finishes are great for a comfortable and polished look. Avoid anything too glossy or shimmery. Think shades like a muted rose, a light mauve, or a nude that's slightly deeper than your natural lip color. Brands like NARS Audacious Lipstick in Anna or Charlotte Tilbury Pillow Talk are excellent choices. Apply the lipstick directly from the bullet or use a lip brush for more precise application.
The "Girls' Night Out" Lip: Bold and Fun
This is your chance to experiment with bold colors and finishes! Go for a bright red, a deep berry, or even a glittery lip. Liquid lipsticks, cream lipsticks, and even lip glosses are all fair game. Don't be afraid to try something new and have fun with it! Brands like Pat McGrath Labs MatteTrance Lipstick in Elson or Dior Rouge Dior Lipstick in 999 are iconic choices. Make sure your lip liner is on point to prevent feathering with bolder shades. And don't forget to take lots of pictures!
The "Zoom Meeting" Lip: Quick and Easy
When you're rushing to get ready for a Zoom meeting, you need a lipstick that's quick and easy to apply. A tinted lip balm or a sheer lipstick is a great option. These formulas are hydrating, low-maintenance, and add a touch of color to your lips without requiring a lot of precision. Think shades like a sheer berry, a light pink, or a nude with a hint of shimmer. Brands like Burt's Bees Tinted Lip Balm or Clinique Almost Lipstick in Black Honey are perfect choices. You can even apply these formulas without a mirror!
Advanced Lipstick Techniques and Tips for Professionals
Ready to take your lipstick game to the next level? Here are some advanced techniques and tips for achieving a truly flawless finish.
Creating an Ombre Lip Effect
The ombre lip is a gradient effect that creates a fuller, more dimensional look. Start by lining your lips with a darker lip liner. Then, fill in the outer edges of your lips with the same liner. Apply a lighter lipstick shade to the center of your lips. Use a lip brush to blend the two shades together, creating a seamless gradient. You can also use a lip gloss in the center of your lips to add extra shine and dimension.
Using Concealer to Highlight the Lip Line
Applying a small amount of concealer around your lip line can help to create a more defined and polished look. Use a small concealer brush to apply the concealer to the outer edges of your lips. Blend the concealer outwards for a seamless finish. This technique can also help to prevent lipstick from feathering.
Setting Lipstick with Translucent Powder for Extra Long Wear
Setting your lipstick with translucent powder can help to extend its wear and prevent it from transferring. After applying your lipstick, blot your lips with a tissue. Then, use a small brush to apply a light dusting of translucent powder to your lips. Be careful not to apply too much powder, as this can make your lips look dry.
Layering Different Lipstick Textures for a Custom Finish
Experimenting with different lipstick textures can help you create a custom finish that's perfect for your individual style. For example, you can layer a matte lipstick over a creamy lipstick for a long-lasting, semi-matte finish. Or, you can layer a lip gloss over a matte lipstick for a glossy, dimensional look. Don't be afraid to experiment and find what works best for you!
The Importance of Exfoliating Your Lips Regularly
Exfoliating your lips regularly is essential for maintaining smooth, healthy lips. Use a lip scrub or a soft toothbrush to gently exfoliate your lips. This will remove dead skin cells and prevent your lipstick from clinging to dry patches. You can also make your own lip scrub by mixing sugar with honey or olive oil.
So there you have it! All the tips and tricks you need to conquer any lipstick challenge. Remember, practice makes perfect, so don’t be afraid to experiment and find what works best for you. Now go out there and rock that perfect pout!
:max_bytes(150000):strip_icc()/277019-baked-pork-chops-with-cream-of-mushroom-soup-DDMFS-beauty-4x3-BG-7505-5762b731cf30447d9cbbbbbf387beafa.jpg)