Mixing Lipstick Colors: Create Your Own Custom Shade
Sample meta description.
Why Mix Lipstick Colors The Art of Custom Lipstick Shades
Okay, let's be real. We've all been there. Staring into our makeup bags, overflowing with lipsticks, and still thinking, "None of these are quite right." That perfect shade you're envisioning? Sometimes, it just doesn't exist... until you create it! Mixing lipstick colors isn't just a fun experiment; it's a way to unlock a world of personalized beauty. Think of yourself as a lipstick alchemist, transforming ordinary shades into extraordinary masterpieces. This isn't just about saving money (although, hello, less lipstick buying!), it's about expressing your unique style and finding that *perfect* shade that complements your skin tone, outfit, and mood.
The Essentials Your Lipstick Mixing Kit Checklist
Before you dive headfirst into your lipstick collection, let's gather the essentials. You wouldn't paint a masterpiece without brushes, right? Similarly, successful lipstick mixing requires a few key tools:
- Lipstick Palette or Small Dish: A dedicated space for mixing. A stainless steel palette is ideal as it's easy to clean and won't absorb color. A small ceramic dish will also work. Avoid porous surfaces like paper towels, as they'll soak up your precious lipstick.
- Lipstick Spatula or Mixing Tool: This helps you scoop out lipstick and blend colors smoothly. A stainless steel spatula is hygienic and durable. A toothpick can work in a pinch, but be careful of splinters.
- Lip Brush: For precise application. A good lip brush allows you to control the amount of lipstick you apply and helps create a smooth, even finish.
- Mirror: Essential for seeing what you're doing! Good lighting is also crucial.
- Makeup Remover Wipes: Because mistakes happen! Keep these handy for quick clean-ups.
- Your Lipstick Collection: The stars of the show! Gather a variety of shades, textures (matte, cream, gloss), and finishes. Don't be afraid to experiment!
Understanding Lipstick Undertones Finding Your Perfect Match
Knowing your skin's undertone is crucial for creating a lipstick color that flatters you. There are three main undertones: warm, cool, and neutral.
- Warm Undertones: These have yellow or golden hues. Lipsticks with warm undertones, like corals, oranges, and warm reds, tend to look best.
- Cool Undertones: These have pink or blue hues. Lipsticks with cool undertones, like pinks, berries, and cool reds, tend to be more flattering.
- Neutral Undertones: These have a balance of warm and cool hues. You can generally wear a wider range of lipstick colors.
How to Determine Your Undertone:
- Vein Test: Look at the veins on your wrist. If they appear blue or purple, you likely have cool undertones. If they appear green, you likely have warm undertones. If you can't tell, you likely have neutral undertones.
- Jewelry Test: Which looks better on you, gold or silver jewelry? Gold tends to complement warm undertones, while silver complements cool undertones.
- White vs. Off-White Test: Which looks better against your skin, pure white or off-white? Off-white tends to flatter warm undertones, while pure white flatters cool undertones.
Lipstick Mixing 101 Basic Color Theory for Lipstick
Remember those color wheels from art class? They're surprisingly helpful when mixing lipstick! Understanding basic color theory can help you predict how different colors will combine.
- Primary Colors: Red, yellow, and blue. These are the foundation of all other colors.
- Secondary Colors: Orange (red + yellow), green (blue + yellow), and purple (red + blue).
- Tertiary Colors: Created by mixing a primary color with a neighboring secondary color. Examples include red-orange, yellow-orange, yellow-green, blue-green, blue-violet, and red-violet.
- Complementary Colors: Colors opposite each other on the color wheel. These colors create a strong contrast and can be used to neutralize each other. For example, green neutralizes red.
Lipstick Mixing Tips Based on Color Theory:
- To Warm Up a Cool Shade: Add a touch of orange or yellow.
- To Cool Down a Warm Shade: Add a touch of blue or purple.
- To Neutralize a Shade: Add a touch of its complementary color. For example, add a tiny bit of green to neutralize a red lipstick that's too bright.
- Start Small: Add small amounts of each color at a time. It's easier to add more than to take away.
- Mix Thoroughly: Ensure the colors are completely blended before applying.
Step By Step Lipstick Mixing Guide From Beginner to Pro
Ready to start mixing? Here's a step-by-step guide:
- Prepare Your Workspace: Gather your supplies and set up your mixing area.
- Choose Your Base Colors: Select two or three lipsticks that you want to combine. Consider the undertones and finishes of each lipstick.
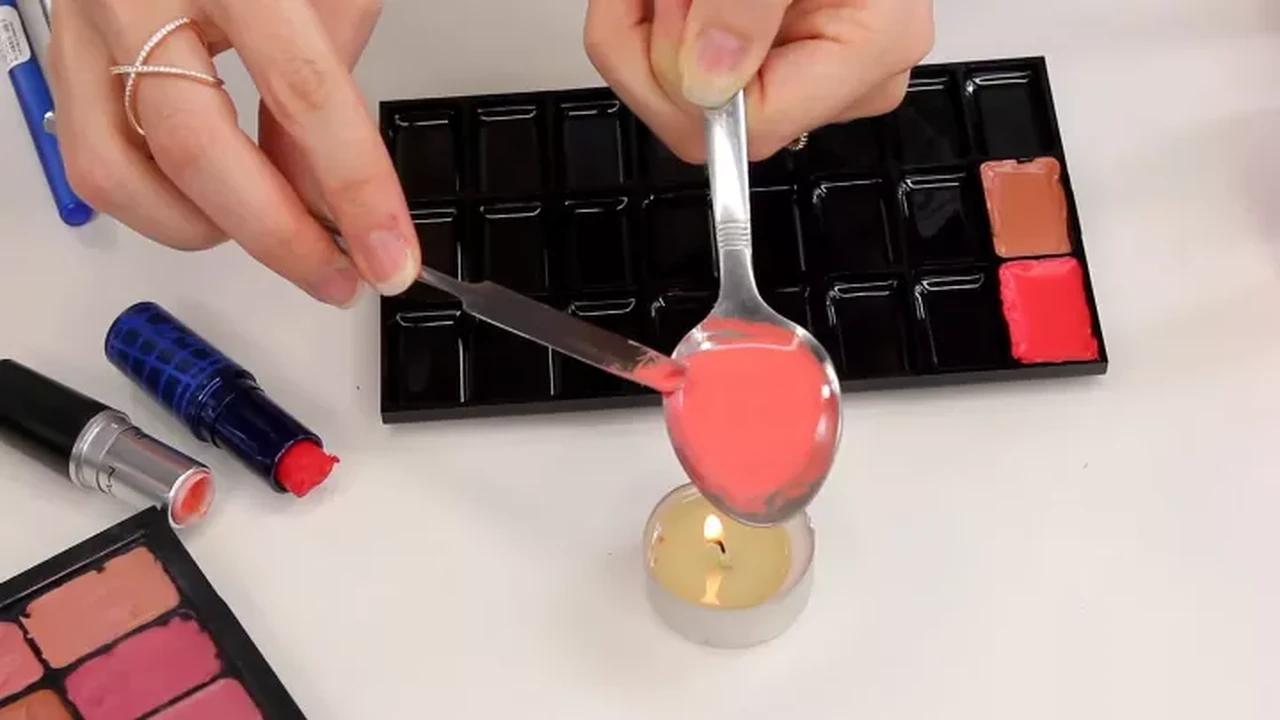
- Scoop Out Lipstick: Use your spatula to scoop out a small amount of each lipstick onto your palette. Remember, start small!
- Mix Thoroughly: Use your spatula to blend the colors together until you achieve a uniform shade.
- Test the Color: Apply a small amount of the mixed lipstick to your wrist or the back of your hand. This will give you a better idea of how the color will look on your skin.
- Adjust as Needed: If you're not happy with the color, add more of one or both of the original lipsticks until you achieve your desired shade.
- Apply to Lips: Once you're satisfied with the color, use your lip brush to apply it to your lips.
- Clean Up: Clean your spatula and palette with makeup remover wipes.
Troubleshooting Common Lipstick Mixing Mistakes and How to Fix Them
Lipstick mixing isn't always perfect. Here are some common mistakes and how to fix them:
- Color is Too Light: Add a darker shade.
- Color is Too Dark: Add a lighter shade.
- Color is Too Warm: Add a cool-toned shade.
- Color is Too Cool: Add a warm-toned shade.
- Color is Muddy: You may have mixed too many colors together, or you may have mixed colors that don't complement each other. Try starting over with fewer colors.
- Texture is Uneven: You may have mixed lipsticks with different textures (e.g., matte and glossy). Try to stick to lipsticks with similar textures, or add a lip gloss on top to even out the finish.
Lipstick Texture Transformations Matte to Glossy and Everything In Between
Don't just focus on color! You can also alter the texture of your lipsticks.
- Matte to Glossy: Add a clear lip gloss to your mixed lipstick.
- Glossy to Matte: Blot your lips with a tissue after applying your lipstick. You can also apply a translucent powder over your lipstick to mattify it.
- Cream to Sheer: Mix your cream lipstick with a clear lip balm.
Mixing Lipstick for Different Skin Tones Best Shades and Combinations
Here are some lipstick mixing suggestions based on skin tone:
- Fair Skin: Light pinks, nudes, and corals. Try mixing a light pink with a nude lipstick for a natural, everyday look.
- Medium Skin: Roses, berries, and mauves. Try mixing a rose lipstick with a berry lipstick for a pop of color.
- Olive Skin: Peaches, oranges, and browns. Try mixing a peach lipstick with a brown lipstick for a warm, bronzed look.
- Dark Skin: Deep reds, purples, and plums. Try mixing a deep red lipstick with a purple lipstick for a bold, statement lip.
Creating Nude Lipstick Shades The Art of the Perfect Nude Lip
Finding the perfect nude lipstick can be tricky. Mixing your own allows you to create a shade that perfectly matches your skin tone. Start with a light beige or nude lipstick as your base. Then, add small amounts of other colors to adjust the undertone. For example, if you have warm undertones, add a touch of peach or orange. If you have cool undertones, add a touch of pink or mauve.
Bold and Dramatic Lipstick Colors Mixing for a Statement Lip
Want to make a statement? Mixing bold colors is the way to go! Try mixing a red lipstick with a purple lipstick for a vampy, dramatic look. Or, mix a pink lipstick with an orange lipstick for a bright, summery lip.
Occasion Specific Lipstick Mixing Day to Night and Everything Else
Consider the occasion when mixing your lipstick. For daytime, opt for lighter, more natural shades. For evening, you can go bolder and more dramatic.
- Daytime: Nudes, pinks, corals.
- Evening: Reds, berries, plums.
- Special Occasions: Glittery shades, metallic shades, bold colors.
Recommended Products for Lipstick Mixing Your Arsenal of Must Haves
Here are some specific product recommendations to get you started:
- Lipstick Palette: MAKE UP FOR EVER Stainless Steel Palette ($22). Durable and easy to clean.
- Lipstick Spatula: Sephora Collection PRO Angled Lip Brush #85 ($18). Provides precise application.
- Lip Brushes: Real Techniques Lip Brush ($6). Affordable and effective.
- Nude Lipstick: MAC Cosmetics Matte Lipstick in Velvet Teddy ($21). A classic nude shade that works well as a base.
- Red Lipstick: NARS Audacious Lipstick in Rita ($34). A vibrant, long-lasting red.
- Berry Lipstick: Clinique Almost Lipstick in Black Honey ($25). A universally flattering berry shade.
- Lip Gloss: Fenty Beauty Gloss Bomb Universal Lip Luminizer ($21). Adds shine and hydration.
Product Comparisons Choosing the Right Lipsticks for Mixing
When choosing lipsticks for mixing, consider the following factors:
- Pigmentation: Highly pigmented lipsticks will give you more color payoff.
- Texture: Choose lipsticks with similar textures to avoid an uneven finish.
- Longevity: Long-lasting lipsticks will help your custom shade stay put.
- Price: Lipstick prices can vary widely. Choose lipsticks that fit your budget.
Example Comparison:
| Lipstick | Pigmentation | Texture | Longevity | Price |
|---|---|---|---|---|
| MAC Cosmetics Matte Lipstick | High | Matte | Long-lasting | $21 |
| NARS Audacious Lipstick | High | Creamy | Long-lasting | $34 |
| Maybelline Color Sensational Lipstick | Medium | Creamy | Medium | $8 |
Real World Lipstick Mixing Scenarios And Their Perfect Shades
Let's explore some real-world scenarios and the perfect mixed lipstick shades for each:
- Job Interview: A neutral, polished look is key. Mix a nude lipstick with a touch of rose for a sophisticated and professional shade.
- Date Night: A touch of glamour is perfect. Mix a red lipstick with a berry lipstick for a romantic and alluring shade.
- Girls' Night Out: Fun and playful! Mix a bright pink lipstick with a touch of orange for a vibrant and energetic shade.
- Wedding: Elegant and timeless. Mix a rose lipstick with a touch of shimmer for a sophisticated and celebratory shade.
- Everyday Wear: Comfortable and natural. Mix a nude lipstick with a touch of your favorite color for a personalized and effortless shade.
Storing Your Custom Lipstick Shades Keeping Your Creations Fresh
To keep your custom lipstick shades fresh, store them in a cool, dry place away from direct sunlight. You can store them in small, airtight containers or in empty lipstick tubes. Be sure to label each container with the colors you used and the date you mixed them.
The Future of Lipstick Mixing Personalized Beauty and Beyond
Lipstick mixing is more than just a trend; it's a movement towards personalized beauty. As technology advances, we may see even more innovative ways to create custom lipstick shades, such as online tools that allow you to virtually mix colors and order your perfect shade. The possibilities are endless!
:max_bytes(150000):strip_icc()/277019-baked-pork-chops-with-cream-of-mushroom-soup-DDMFS-beauty-4x3-BG-7505-5762b731cf30447d9cbbbbbf387beafa.jpg)