How to Create an Ombre Lip with Lipstick
Sample meta description.
What is Ombre Lips and Why You Need to Try It
Okay, let's talk ombre lips. You know, that gradient lip look that's been all over Instagram and TikTok? It's basically a way to make your lips look fuller, more defined, and just generally *amazing*. Instead of a solid color, you're blending two or more shades together to create a seamless gradient. Think of it like a sunset for your lips! And the best part? It's way easier to achieve than you might think. Plus, it's a great way to use up those lipsticks you bought and haven't quite fallen in love with on their own.
Essential Tools for Your Ombre Lip Adventure
Before we dive into the technique, let's gather our supplies. You'll need:
- Lipstick(s): Two or three shades work best. A darker shade for the outer edges and a lighter shade for the center is the classic combo. But hey, experiment! Maybe a bold red fading into a bright pink? Or a deep berry blending into a nude? The possibilities are endless!
- Lip Liner (Optional but Recommended): This helps to define your lip shape and prevent your lipstick from bleeding. Choose a shade that's close to your darker lipstick.
- Concealer or Foundation: This is to create a blank canvas and help the colors blend more smoothly.
- Lip Brush or Angled Brush: A lip brush gives you more precision, especially when blending the colors. An angled brush can work too, especially for the outer edges.
- Cotton Swabs or Makeup Wipes: For cleaning up any mistakes. Trust me, you'll probably need them!
- Lip Balm: Hydrated lips are happy lips! Apply a thin layer of lip balm before you start to create a smooth base.
Step-by-Step Guide How to Create a Perfect Ombre Lip
Alright, let's get down to business! Follow these steps for a flawless ombre lip:
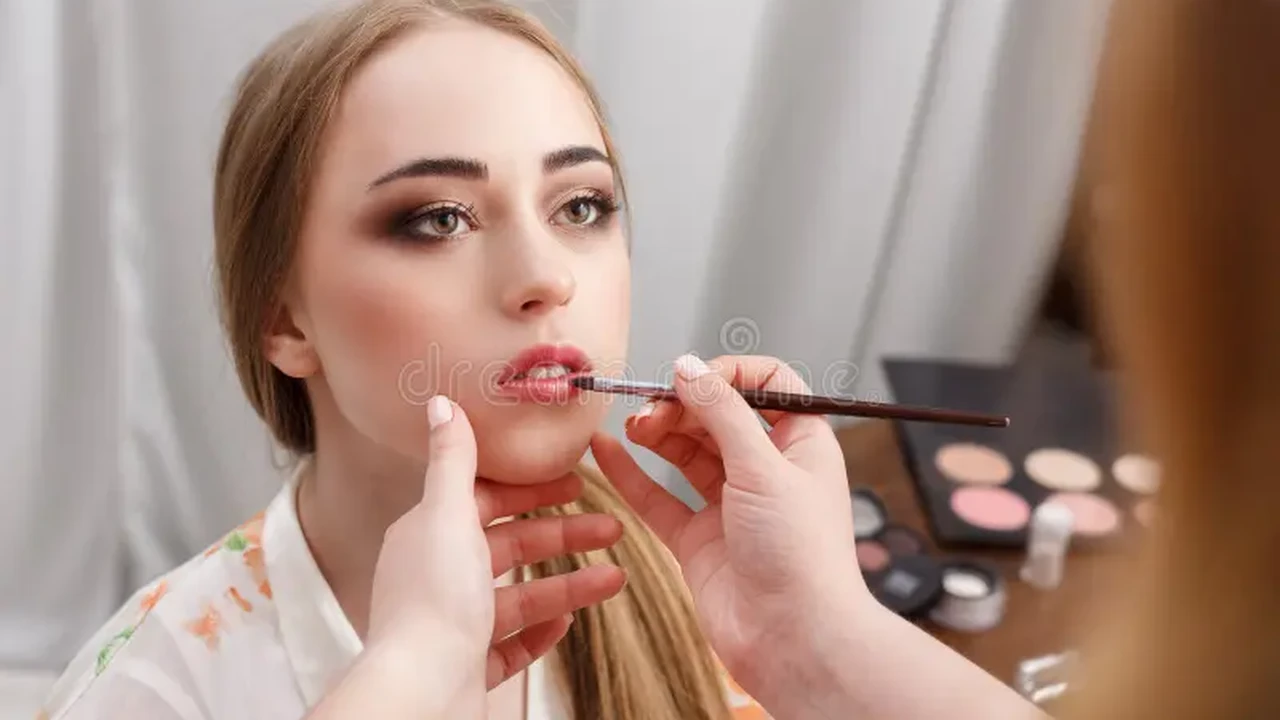
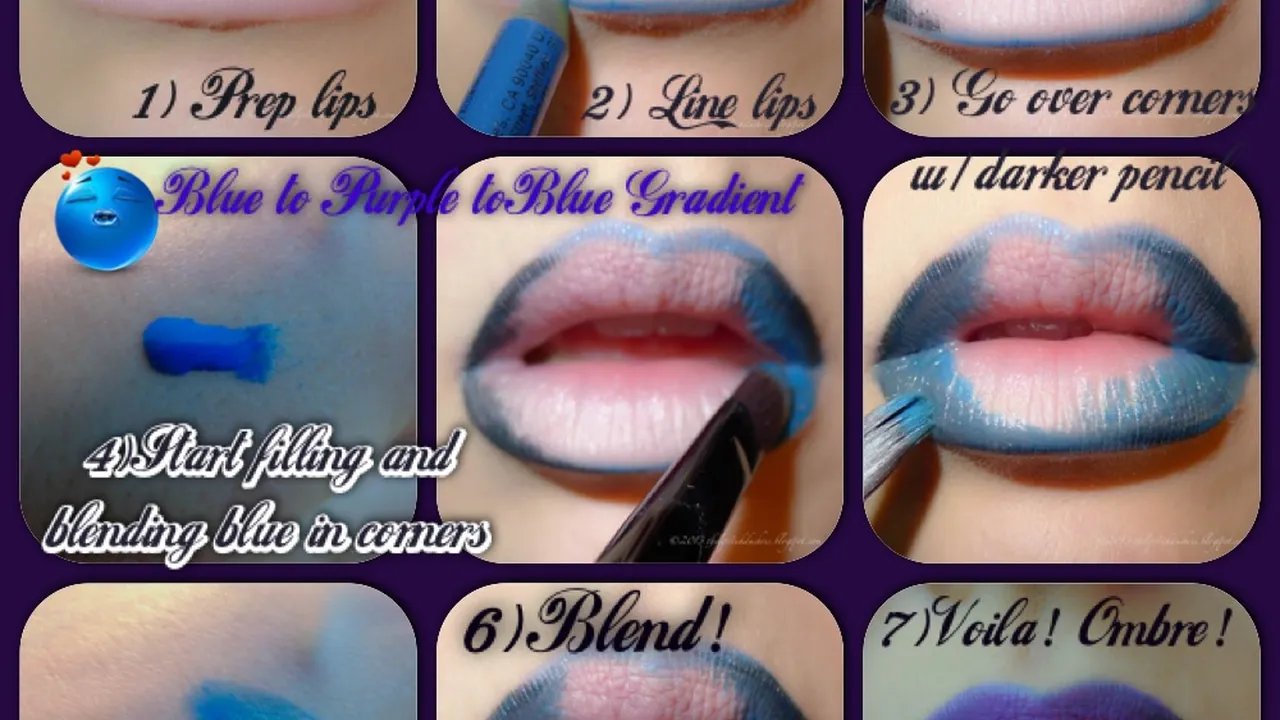
- Prep Your Lips: Exfoliate your lips with a gentle lip scrub to remove any dead skin. Then, apply a thin layer of lip balm and let it soak in for a few minutes.
- Create a Base: Apply a thin layer of concealer or foundation to your lips to neutralize your natural lip color. This will help the lipsticks show up more vividly.
- Line Your Lips (Optional): If you're using lip liner, carefully line the outer edges of your lips with your chosen shade. Slightly overline if you want to make your lips look fuller.
- Apply the Darker Shade: Apply the darker lipstick to the outer corners of your lips, blending inwards towards the center. Don't worry about being perfect, we'll blend it later. Think about creating a "V" shape on your upper lip and an inverted "V" shape on your lower lip.
- Apply the Lighter Shade: Apply the lighter lipstick to the center of your lips.
- Blend, Blend, Blend!: This is the most important step! Use your lip brush or angled brush to gently blend the two colors together where they meet. The goal is to create a seamless gradient with no harsh lines. Use small, circular motions. If you're using your finger, gently tap the colors together.
- Clean Up: Use a cotton swab dipped in makeup remover to clean up any smudges or mistakes around the edges of your lips.
- Set with Powder (Optional): For extra long wear, lightly dust your lips with translucent powder.
- Add Gloss (Optional): A touch of clear lip gloss in the center of your lips can add a beautiful shine and further enhance the ombre effect.
Product Recommendations for Ombre Lip Perfection Best Lipstick for Ombre Lips
Okay, so you're ready to try this ombre lip thing. But what products should you use? Here are a few of my favorites, broken down by category and price point:
High-End Lipstick Options for Long-Lasting Ombre Lip
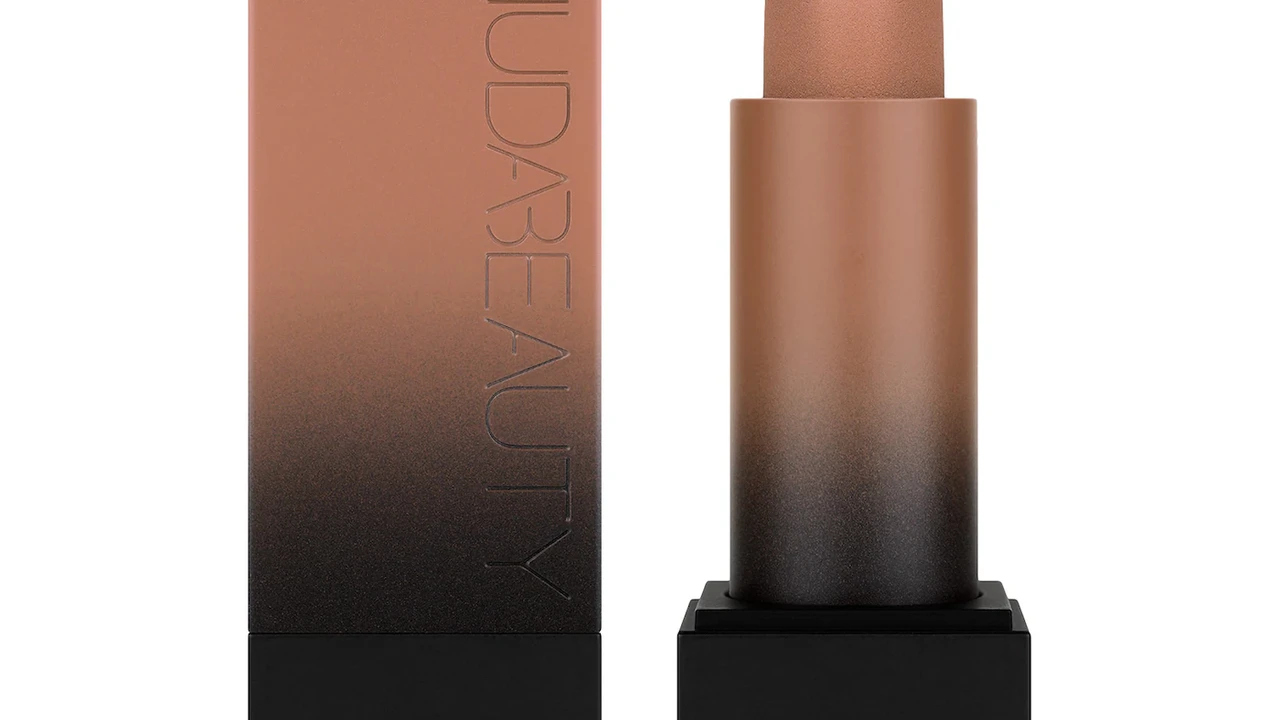
- Charlotte Tilbury Matte Revolution Lipstick (Approximately $34): These lipsticks are known for their creamy, comfortable formula and long-lasting wear. The shade "Pillow Talk" is a classic nude-pink that's perfect for creating a subtle ombre effect when paired with a deeper berry shade like "Walk of No Shame".
- Pros: Long-lasting, comfortable, beautiful color range.
- Cons: Pricey.
- Best For: Special occasions, when you want your lip look to last all night.
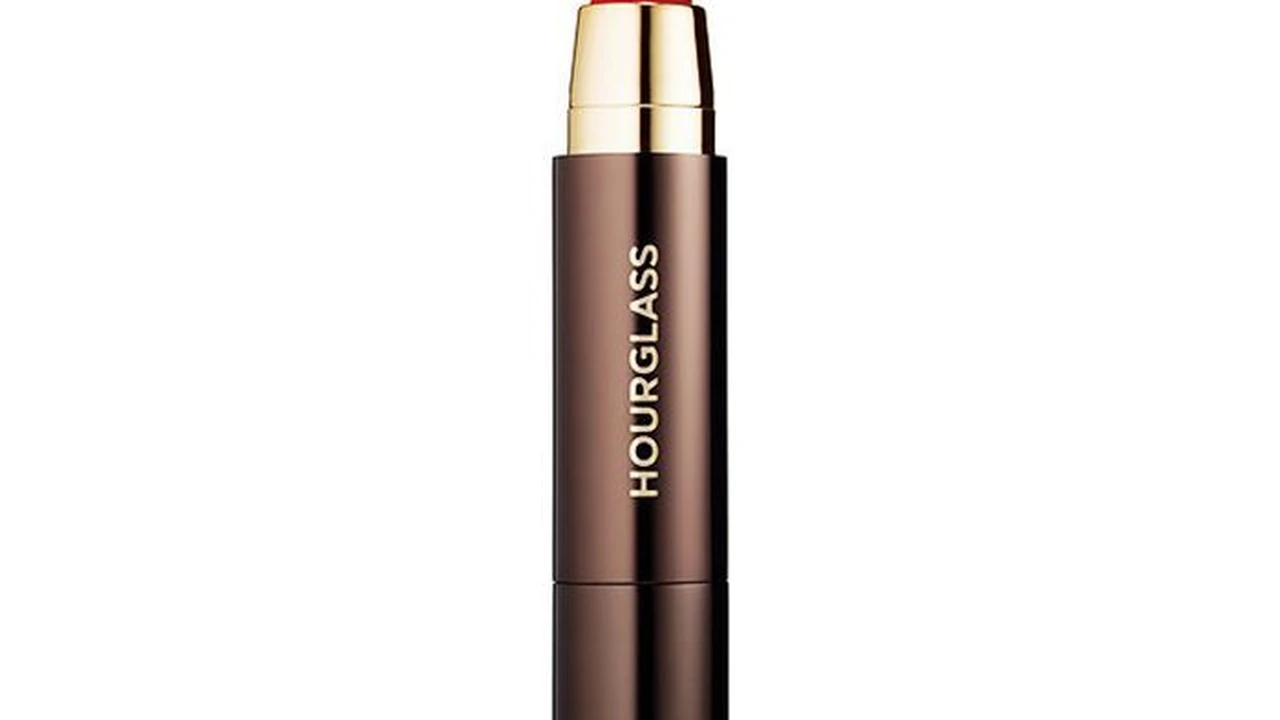
- Tom Ford Lip Color (Approximately $58): These lipsticks are luxurious and highly pigmented. The shade "Spanish Pink" is a beautiful light pink that's perfect for the center of the lips, especially when paired with a deeper red like "Ruby Rush".
- Pros: Highly pigmented, luxurious packaging, wide range of shades.
- Cons: Very expensive.
- Best For: When you want to splurge on a truly high-end lipstick.
Mid-Range Lipstick Options for Daily Ombre Lip
- MAC Lipstick (Approximately $22): A classic for a reason! MAC lipsticks offer a huge range of colors and finishes. "Ruby Woo" (retro matte) paired with "Lustre Lipstick See Sheer" (lustre) is a beautiful and bold combination.
- Pros: Huge color selection, various finishes, relatively affordable.
- Cons: Can be drying (especially the matte formulas), not always the longest-lasting.
- Best For: Everyday wear, experimenting with different colors and finishes.
- NARS Audacious Lipstick (Approximately $34): These lipsticks are known for their intense pigmentation and long-lasting wear. "Audrey" is a classic red that pairs beautifully with a lighter pink like "Anna."
- Pros: Highly pigmented, long-lasting, comfortable formula.
- Cons: Can be slightly drying, limited color selection.
- Best For: When you want a bold, long-lasting lip look.
Affordable Lipstick Options for Budget-Friendly Ombre Lip
- Maybelline Color Sensational Lipstick (Approximately $8): These lipsticks are affordable and come in a wide range of colors. "Touch of Spice" is a great nude shade for creating a subtle ombre effect. Pair it with a darker berry like "Divine Wine."
- Pros: Very affordable, widely available, good color selection.
- Cons: Not the longest-lasting, can be slightly drying.
- Best For: Trying out the ombre lip trend without breaking the bank.
- NYX Professional Makeup Soft Matte Lip Cream (Approximately $6): These lip creams are lightweight and comfortable, and they come in a wide range of colors. "Cannes" is a beautiful dusty rose that pairs well with a deeper mauve like "Copenhagen."
- Pros: Very affordable, comfortable, matte finish.
- Cons: Not the longest-lasting, can transfer easily.
- Best For: A comfortable, matte lip look on a budget.
Ombre Lip Colors for Different Skin Tones Best Ombre Lip for Fair Skin
The key to a great ombre lip is choosing colors that complement your skin tone. Here are some suggestions:
- Fair Skin: Light pinks, peaches, and nudes look beautiful on fair skin. Try pairing a light pink like Maybelline Color Sensational Lipstick in "Pink Please" with a slightly deeper rose shade like L'Oreal Colour Riche Lipstick in "Fairest Nude." Avoid colors that are too dark, as they can look harsh.
- Medium Skin: Berry shades, mauves, and warm browns look stunning on medium skin tones. Try pairing a mauve like NYX Soft Matte Lip Cream in "Stockholm" with a deeper berry shade like Maybelline Color Sensational Lipstick in "Divine Wine."
- Olive Skin: Oranges, corals, and reds with warm undertones are perfect for olive skin. Try pairing a coral shade like MAC Lipstick in "Lady Danger" with a lighter orange like NARS Lipstick in "Orgasm."
- Dark Skin: Deep reds, plums, and browns look gorgeous on dark skin tones. Try pairing a deep plum like Black Radiance Perfect Tone Lipstick in "Black Cherry" with a lighter brown like Maybelline Color Sensational Lipstick in "Nude Embrace."
Ombre Lip Looks for Different Occasions
Ombre lips aren't just for Instagram selfies! You can adapt the look for different occasions:
- Everyday Look: A subtle nude-to-pink ombre is perfect for everyday wear. Use shades that are close to your natural lip color.
- Night Out: Amp up the drama with a bold red-to-black ombre. This look is perfect for a night out on the town.
- Special Occasion: A berry-to-gold ombre can be stunning for a wedding or other special event. Use a gold lip topper in the center of your lips for extra sparkle.
Troubleshooting Ombre Lip Problems How to Fix Common Ombre Lip Mistakes
Sometimes, even with the best intentions, your ombre lip might not turn out quite as planned. Here are some common problems and how to fix them:
- Harsh Lines: If you see harsh lines between the colors, blend, blend, blend! Use a lip brush or your finger to gently blend the colors together until the lines disappear.
- Uneven Color Distribution: If one color is overpowering the other, try adding more of the lighter shade to the center of your lips.
- Lipstick Bleeding: If your lipstick is bleeding outside your lip line, use a lip liner to create a barrier. You can also use a concealer brush to clean up the edges.
- Dry Lips: If your lips are looking dry and flaky, exfoliate them and apply a hydrating lip balm before you start.
Beyond Lipstick Exploring Ombre Lips with Lip Stains and Tints
While lipstick is a classic choice, you can also achieve a beautiful ombre effect with lip stains and tints. These products tend to be longer-lasting and less likely to transfer than lipsticks. They often create a more natural, "stained" look that's perfect for everyday wear. Look for water-based or gel-based formulas for easy blending.
Different Blending Techniques for Ombre Lips
There's no single "right" way to blend your ombre lip. Experiment with different techniques to find what works best for you:
- The Finger Tap: Use your fingertip to gently tap the colors together where they meet. This is a good option for a soft, diffused look.
- The Lip Brush Swirl: Use a lip brush to gently swirl the colors together. This is a good option for more precise blending.
- The Cotton Swab Smudge: Use a cotton swab to gently smudge the colors together. This is a good option for a grungy, lived-in look.
The Latest Ombre Lip Trends Ombre Lip Ideas
Ombre lips are always evolving! Here are some of the latest trends:
- The "Inner Corner Pop": Instead of applying the lighter shade to the entire center of your lips, focus on just the inner corners. This creates a subtle highlight that makes your lips look fuller.
- The Glitter Ombre: Add a touch of glitter to the center of your lips for a festive, eye-catching look.
- The Two-Toned Nude: Use two different shades of nude lipstick to create a subtle, sophisticated ombre effect.
Taking Care of Your Lips After Creating Ombre Lip
Don't forget to take care of your lips after removing your ombre lip look. Gently remove all traces of lipstick with a makeup remover, and then apply a hydrating lip balm. You can also use a lip mask overnight for extra hydration.
:max_bytes(150000):strip_icc()/277019-baked-pork-chops-with-cream-of-mushroom-soup-DDMFS-beauty-4x3-BG-7505-5762b731cf30447d9cbbbbbf387beafa.jpg)